中国广东省深圳市龙华新区民之街道溪山美地
518109
+86?13113668890
+86?755?29812080<netkiller@msn.com>
版权 ? 2011, 2012 http://netkiller.github.com
$Date: 2012-11-27 17:58:47 +0800 (Tue, 27 Nov 2012) $
摘要
在工作中,需要经常为新系统安装软件,重复而简单,但又不得不作,我将过去几年中工作中临时写的脚本这里了一下,能够实现半自动化安装标本,只需要Ctrl+C, Ctrl+V 快速粘贴复制,即可快速完成安装
我的系列文档
?
Netkiller Architect 手札 Netkiller Developer 手札 Netkiller Testing 手札 Netkiller Cryptography 手札 Netkiller Version 手札 Netkiller Linux 手札 Netkiller Debian 手札 Netkiller CentOS 手札 Netkiller FreeBSD 手札 Netkiller Security 手札 Netkiller Web 手札 Netkiller Monitoring 手札 Netkiller Storage 手札 Netkiller Mail 手札 Netkiller Shell 手札 Netkiller Database 手札 Netkiller PostgreSQL 手札 Netkiller MySQL 手札 Netkiller NoSQL 手札 Netkiller LDAP 手札 Netkiller Installation 手札 Netkiller Cisco IOS 手札 Netkiller Intranet 手札 Netkiller Multimedia 手札 Netkiller Docbook 手札 Netkiller Management 手札 ? ? ? ??
您可以使用iBook阅读当前文档
目录
lokkit --disabled --selinux=disabled

yum update -y
rpm --import http://apt.sw.be/RPM-GPG-KEY.dag.txt
rpm -K http://packages.sw.be/rpmforge-release/rpmforge-release-0.5.2-2.el6.rf.x86_64.rpm
rpm -i http://packages.sw.be/rpmforge-release/rpmforge-release-0.5.2-2.el6.rf.x86_64.rpm

yum install -y telnet wget rsync
yum install -y system-config-network-tui
yum install -y bind-utils
yum install -y vim-enhanced

yum install -y openssh-clients
yum remove dhclient -y
配置DNS
echo -ne "
search example.com
nameserver 208.67.222.222
nameserver 202.67.220.220
nameserver 8.8.8.8
nameserver 4.4.4.4
" > /etc/resolv.conf
修改文件打开数
cat >> /etc/security/limits.conf <<EOF
root 	soft nofile 65536
root 	hard nofile 65536
www	soft nofile 65536
www 	hard nofile 65536
mysql	soft nofile 65536
mysql 	hard nofile 65536
EOF
echo -ne "

* soft nofile 65536
* hard nofile 65536
" >> /etc/security/limits.conf
而上面我市针对www用户设置,也就是web服务器,其他用户是受限的。
内核参数调整
cat >> /etc/sysctl.conf <<EOF

net.ipv4.ip_local_port_range = 1024 65500
net.ipv4.tcp_syncookies = 1
net.ipv4.tcp_tw_reuse = 1
net.ipv4.tcp_tw_recycle = 1
net.ipv4.tcp_fin_timeout = 60
net.ipv4.tcp_keepalive_time = 1200
net.ipv4.tcp_max_syn_backlog = 8192
net.ipv4.tcp_max_tw_buckets = 4096
EOF
我一般分区规划是,/系统根分区,swap交换分区,/www数据分区,同时 禁止写入atime时间,因为/www频繁请求会影响IO
临时mount
mount -o remount,noatime,nodiratime /dev/sda3 /mnt/your
LABEL 方式
LABEL=/www /www ext3 defaults,noatime,nodiratime 1 1
UUID 方式
UUID=eeff3e86-7964-4a48-ac02-51ea167ea6b2 /www ext4 defaults 1 2
至此,Linux 的OS部分安装配置与优化完成。
ntp 服务同步服务器的时间,需要安装。
# redhat 5.6 cp /etc/ntp.conf.original /etc/ntp.conf
yum install ntp -y
指定ntp服务器,如果你没有ntp server,下面步骤不用执行
cp /etc/ntp.conf /etc/ntp.conf.original
vim /etc/ntp.conf <<VIM > /dev/null 2>&1
:22,24s/^/#/
:25,25s/^/\rserver 172.16.3.51\rserver 172.16.3.52\r/
:wq
VIM
service ntpd start
chkconfig ntpd on
用于服务器的状态监控
yum install net-snmp -y
vi /etc/snmp/snmpd.conf <<VIM > /dev/null 2>&1
:62,62s/systemview/all/
:85,85s/^#//
:wq
VIM
service snmpd start
chkconfig snmpd on
服务器故障警告
yum install -y nrpe nagios-plugins
vi /etc/nagios/nrpe.cfg <<VIM > /dev/null 2>&1
:%s/allowed_hosts=127.0.0.1/allowed_hosts=172.16.1.2/
:wq
VIM

cat >> /etc/nagios/nrpe.cfg <<EOF

#command[check_http]=/usr/lib64/nagios/plugins/check_http -I 127.0.0.1 -p 80 -u http://www.example.com/index.html
command[check_swap]=/usr/lib64/nagios/plugins/check_swap -w 20% -c 10%
command[check_all_disks]=/usr/lib64/nagios/plugins/check_disk -w 20% -c 10% -e
EOF

chkconfig nrpe on
service nrpe start

cat >> /etc/bashrc <<EOF

export HISTTIMEFORMAT="%Y-%m-%d-%H:%M:%S "
EOF
我使用rsync来实现应用的部署。
yum install xinetd rsync -y

vim /etc/xinetd.d/rsync <<VIM > /dev/null 2>&1
:%s/yes/no/
:wq
VIM

cat > /etc/rsyncd.conf <<EOD
uid = root
gid = root
use chroot = no
max connections = 8
pid file = /var/run/rsyncd.pid
lock file = /var/run/rsync.lock
log file = /var/log/rsyncd.log

hosts deny=*
hosts allow=192.168.2.0/255.255.255.0

[www]
    uid = www
    gid = www
    path = /www
    ignore errors
    read only = no
    list = no
    auth users = www
    secrets file = /etc/rsyncd.passwd
EOD

cat >> /etc/rsyncd.passwd <<EOF
www:xxxxxxxxxxxxxxxx
EOF

chmod 600 /etc/rsyncd.*
chmod 600 /etc/rsyncd.passwd

service xinetd restart
根据你的需要,选装。
yum install -y vsftpd
adduser --home-dir /www/target/logs/ --shell /sbin/nologin --password logs.xiu.com logs
echo logs >> /etc/vsftpd/chroot_list

vim /etc/vsftpd/vsftpd.conf <<VIM > /dev/null 2>&1
:%s/#chroot_list_enable=YES/chroot_list_enable=YES/
:%s/#chroot_list_file/chroot_list_file/
VIM

chkconfig vsftpd on
service vsftpd start
写在旧的包,然后准备好rpm文件
rpm -e --nodeps mysql-libs
yum localinstall MySQL-*
安装后查看如下
# rpm -qa | grep MySQL
MySQL-client-5.5.28-1.el6.x86_64
MySQL-shared-5.5.28-1.el6.x86_64
MySQL-devel-5.5.28-1.el6.x86_64
MySQL-shared-compat-5.5.28-1.el6.x86_64
MySQL-server-5.5.28-1.el6.x86_64
由于redhat与centosYUM源中尚未提供php-fpm所以我采用编译安装,网上有一些爱好者制作过php-fpm的rpm包。是否使用你自己那注意。
安装fedora的YUM源,我们需要一些devel包。
rpm -Uvh http://dl.fedoraproject.org/pub/epel/6/x86_64/epel-release-6-7.noarch.rpm
安装编译器与开发包
yum install gcc gcc-c++ make automake autoconf -y
yum install curl-devel libmcrypt-devel gd-devel libjpeg-devel libpng-devel libXpm-devel libxml2-devel libxslt-devel mhash-devel recode-devel openssl-devel -y
安装下面三个rpm包,编译php不需要server与client两个包
MySQL-shared-5.5.28-1.el6.x86_64
MySQL-devel-5.5.28-1.el6.x86_64
MySQL-shared-compat-5.5.28-1.el6.x86_64
将其放置在一个目录中,使用下面命令即可安装
yum localinstall MySQL-*
前面的准备工作就绪后,便可以进入到php的安装阶段
tar zxvf php-5.4.9.tar.gz
cd php-5.4.9

./configure --prefix=/srv/php-5.4.9 \
--with-config-file-path=/srv/php-5.4.9/etc \
--with-config-file-scan-dir=/srv/php-5.4.9/etc/conf.d \
--enable-fpm \
--with-fpm-user=www \
--with-fpm-group=www \
--with-curl \
--with-gd \
--with-jpeg-dir \
--with-png-dir \
--with-freetype-dir \
--with-zlib-dir \
--with-iconv \
--with-mcrypt \
--with-mysql \
--with-mysqli=/usr/bin/mysql_config \
--with-pdo-mysql \
--with-mysql-sock=/var/lib/mysql/mysql.sock \
--with-openssl=shared \
--with-mhash=shared \
--with-xsl=shared \
--with-recode=shared \
--with-pear \
--enable-sockets \
--enable-soap \
--enable-mbstring \
--enable-gd-native-ttf \
--enable-zip \
--enable-xml \
--enable-bcmath \
--enable-calendar \
--enable-shmop \
--enable-dba \
--enable-wddx \
--disable-debug


make && make install
备份配置文件,防止不小心改错而又找不出问题出在哪里。
mkdir -p /srv/php-5.4.9/etc/conf.d
cp php.ini-* /srv/php-5.4.9/etc/
cp /srv/php-5.4.9/etc/php.ini-development /srv/php-5.4.9/etc/php.ini
cp /srv/php-5.4.9/etc/pear.conf{,.original}
ln -s /srv/php-5.4.9/ /srv/php
php默认提供两个配置文件模板php.ini-development用于开发和测试环境;php.ini-production用于生产环境。他们差异是php.ini-development会显示调试信息,即 error_display = On.
# ls php.ini-*
php.ini-development  php.ini-production
下面更改仅供参考,需要根据你的具体情况配置,不要照搬。
vim /srv/php-5.4.9/etc/php.ini <<EOF > /dev/null 2>&1
:%s$;open_basedir = $open_basedir = /www/:/tmp/:/srv/php-5.4.9/lib/php/:/srv/php-5.4.9/bin/$
:%s/memory_limit = 128M/memory_limit = 16M/
:%s!;include_path = ".:/php/includes"!include_path = ".:/srv/php-5.4.9/lib/php:/srv/php-5.4.9/share"!
:%s:extension_dir = "./":extension_dir = "/srv/php-5.4.9/lib/php/extensions":
:%s/upload_max_filesize = 2M/upload_max_filesize = 8M/
:%s/;cgi.fix_pathinfo=0/cgi.fix_pathinfo=1/
:%s$;date.timezone =$date.timezone = Asia/Hong_Kong$
:1367,1367s/session.save_handler = files/session.save_handler = redis/
:1368,1368s#^#session.save_path = "tcp://127.0.0.1:6379"\r#
:1415,1368s/session.name = PHPSESSID/session.name = JSESSIONID/
:wq
EOF
安装启动脚本
cp ./sapi/fpm/init.d.php-fpm /etc/init.d/php-fpm
chmod +x /etc/init.d/php-fpm

chkconfig --add php-fpm
chkconfig php-fpm on
chkconfig --list php-fpm
修改配置文件
cp /srv/php-5.4.9/etc/php-fpm.conf.default /srv/php-5.4.9/etc/php-fpm.conf

vim /srv/php-5.4.9/etc/php-fpm.conf <<end > /dev/null 2>&1
:25,25s/;//
:32,32s/;//
:wq
end
察看配置项
# grep -v '^;' /srv/php-5.4.9/etc/php-fpm.conf | grep -v '^$'
[global]
pid = run/php-fpm.pid


[www]
user = www
group = www
listen = 127.0.0.1:9000

pm = dynamic
pm.max_children = 5
pm.start_servers = 2
pm.min_spare_servers = 1
pm.max_spare_servers = 3
Apc
pecl install apc

cat > /srv/php-5.4.9/etc/conf.d/apc.ini <<EOF
extension=apc.so
EOF
查看安装情况
# /srv/php/bin/php -m | grep apc
apc
vim  ~/.bash_profile <<END > /dev/null 2>&1
:%s#bin#bin:/srv/php/bin#
:wq
END
安装git版本控制客户端
yum install git
从github仓库中克隆一份代码到本地
git clone git://github.com/nicolasff/phpredis.git
编译安装phpredis; 我暂时没有找到 pecl的phpredis源
cd phpredis
phpize
./configure --with-php-config=/srv/php-5.4.9/bin/php-config
make && make install
创建配置文件
cat > /srv/php-5.4.9/etc/conf.d/redis.ini <<EOF
extension=redis.so
EOF
查看安装情况
# php -m | grep redis
redis
下面我们来模拟一个场景,例如 configure的时候出现下面提示
configure: error: Can not find recode.h anywhere under yes /usr/local /usr /opt.
提示找不到recode。h文件,很好办,首先搜索recode包
[root@haproxy php-5.4.9]# yum search recode                                                                                                                                                                                                                        |  327 B     00:00
============================ N/S Matched: recode ====================================
php-recode.x86_64 : A module for PHP applications for using the recode library
recode-devel.i686 : Header files and static libraries for development using recode
recode-devel.x86_64 : Header files and static libraries for development using recode
recode.i686 : Conversion between character sets and surfaces
recode.x86_64 : Conversion between character sets and surfaces

  Name and summary matches only, use "search all" for everything.
然后安装devel包,记住之需要安装devel包即可,其他都是多余。
[root@haproxy php-5.4.9]# yum install recode-devel -y
然后重新运行configure
为web服务器创建一个用户,我喜欢使用www,id为80更容易记,同时将一个单独分区挂在/www上用户存放web应用程序。
groupadd -g 80 www
adduser -o --home /www --uid 80 --gid 80 -c "Web Application" www
添加nginx的YUM源
cat > /etc/yum.repos.d/nginx.repo <<EOF
[nginx]
name=nginx repo
baseurl=http://nginx.org/packages/centos/6/x86_64/
gpgcheck=0
enabled=1
EOF
开始安装nginx
yum search nginx

yum install -y nginx
chkconfig nginx on
service nginx start
如果你不懂编译器优化,建议你使用rpm方案。在不优化的情况下编译出来程序很臃肿。
?
# rpm -qa | grep nginx
nginx-1.2.5-1.el6.ngx.x86_64
mkdir -p /www/www.mydomain.com/htdocs

cd /etc/nginx/conf.d
cp default.conf www.mydomain.com.conf
vim www.mydomain.com.conf
server {
    listen       80;
    server_name  www.mydomain.com;

    charset utf-8;
    access_log  /var/log/nginx/www.mydomain.com.access.log  main;

    location / {
        root   /www/www.mydomain.com/htdocs;
        index  index.html index.php;
    }

    #error_page  404              /404.html;

    # redirect server error pages to the static page /50x.html
    #
    error_page   500 502 503 504  /50x.html;
    location = /50x.html {
        root   /usr/share/nginx/html;
    }

    # proxy the PHP scripts to Apache listening on 127.0.0.1:80
    #
    #location ~ \.php$ {
    #    proxy_pass   http://127.0.0.1;
    #}

    # pass the PHP scripts to FastCGI server listening on 127.0.0.1:9000
    #
    location ~ \.php$ {
        root           html;
        fastcgi_pass   127.0.0.1:9000;
        fastcgi_index  index.php;
        fastcgi_param  SCRIPT_FILENAME  /www/www.mydomain.com/htdocs$fastcgi_script_name;
        include        fastcgi_params;
    }

    # deny access to .htaccess files, if Apache's document root
    # concurs with nginx's one
    #
    location ~ /\.ht {
        deny  all;
    }
}
创建测试页面
cat >> /www/www.mydomain.com/htdocs/index.php <<PHP
<?php
phpinfo();
PHP
启动服务器
service php-fpm start
service nginx start
检查index.php输出
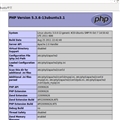
# curl -H HOST:www.mydomain.com http://127.0.0.1/index.php
安装fedora的YUM源,
rpm -Uvh http://dl.fedoraproject.org/pub/epel/6/x86_64/epel-release-6-7.noarch.rpm
安装redis
# yum install redis

# chkconfig redis on

# service redis start