��Ҫ˵����
ͨ����ʾ��ͼƬ�ֱ����� LomoFilter��SketchFilter�����˾���Nokia Imaging SDK ���ã���
��ѧϰ�˾��Ļ���ʹ�úͲ��������á������̵Ĵ������Ƚ��٣�Ҳ������������
�汾 NokiaImagingSDK 1.0.272.0
��������� demo ����ɲ��裺
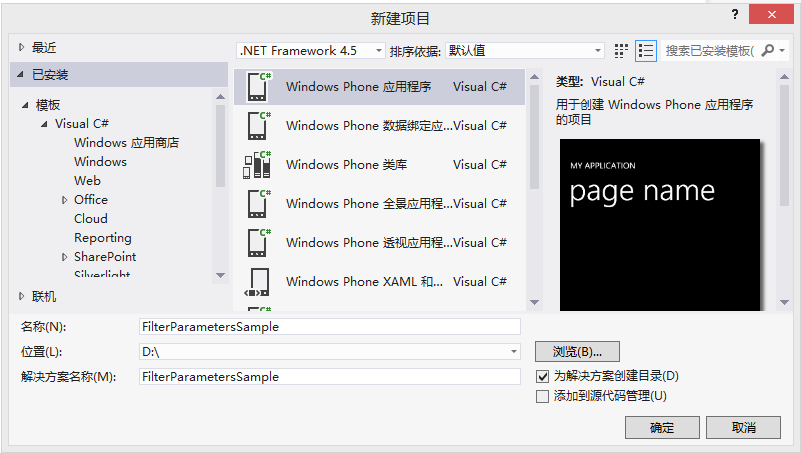
1��ͨ�� Visual Studio 2012 �½�һ��Windows Phone 8 �Ĺ��̣�����Ϊ“FilterParametersSample”��
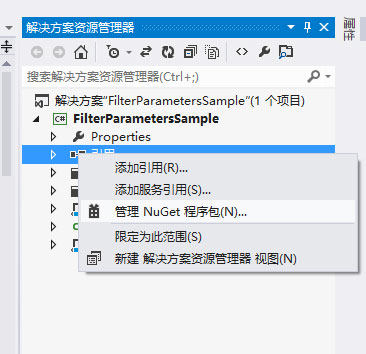
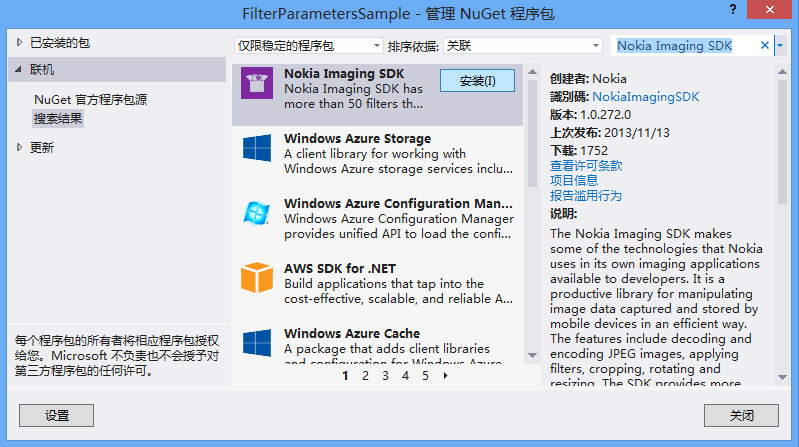
2�� �Ҽ��������̵�“����”��ѡ��“���� NuGet�����”��
�����Ͻ�����������“Nokia Imaging SDK”������װ�� SDK��
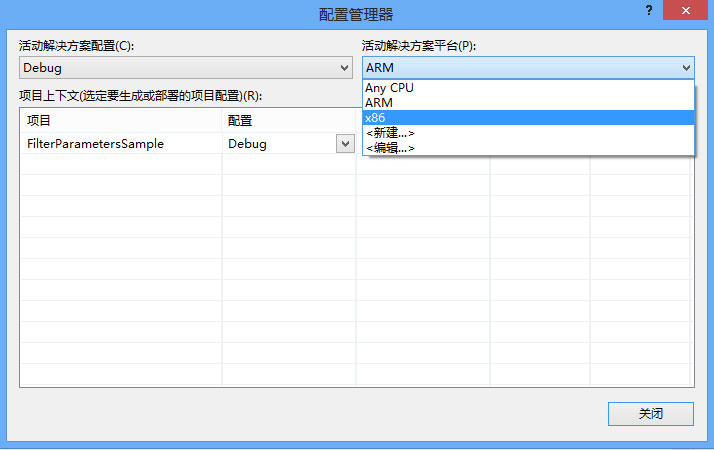
3����Ϊ����ʵ��ʹ��ģ�������ԣ�������Ҫ��“���ù�����”ѡ��“x86”��Visual Studio�˵� -> ���� -> ���ù���������
ע���������� Nokia Imaging SDK�� VS ��������ο���Download and add the libraries to the project
4������Ŀ�ĸ�Ŀ¼������һ��ʾ��ͼƬ “Sample.jpg”��

5���� MainPage.xaml ҳ��������һ�� Image �ؼ�����ʾԭͼ�������� Button �ؼ������� Button �ֱ���ת
�� LomoFilterPage.xaml �� SketchFilterPage.xamlҳ�档������� XAML �滻�� MainPage ҳ������Ϊ LayoutRoot �� grid��
<!--LayoutRoot �ǰ�������ҳ�����ݵĸ�����--> <Grid x:Name="LayoutRoot" Background="Transparent"> <Image Source="/Sample.jpg" Margin="117,82,89,231"/> <Button Content="LomoFilter" HorizontalAlignment="Left" Margin="25,669,0,0" VerticalAlignment="Top"
Width="209" Click="LomoFilter_Button_Click"/> <Button Content="Sketch" HorizontalAlignment="Left" Margin="239,669,0,0"
VerticalAlignment="Top" Width="205" Click="SketchFilter_Button_Click"/> </Grid>
�� MainPage.xaml.cs ҳ��������Ӧ�İ�ť�¼���
// Lomo �������˾��� private void LomoFilter_Button_Click(object sender, RoutedEventArgs e) { NavigationService.Navigate(new Uri("/Pages/LomoFilterPage.xaml", UriKind.Relative)); } // Sketch �����˾�
private void SketchFilter_Button_Click(object sender, RoutedEventArgs e) { NavigationService.Navigate(new Uri("/Pages/SketchFilterPage.xaml", UriKind.Relative)); }
6���½�һ����Ϊ“Pages”���ļ��У���ҳ���зֱ���������ҳ�棺
LomoFilterPage.xaml �� SketchFilterPage.xaml���ֱ��������� Lomo �˾��� Sketch�˾���
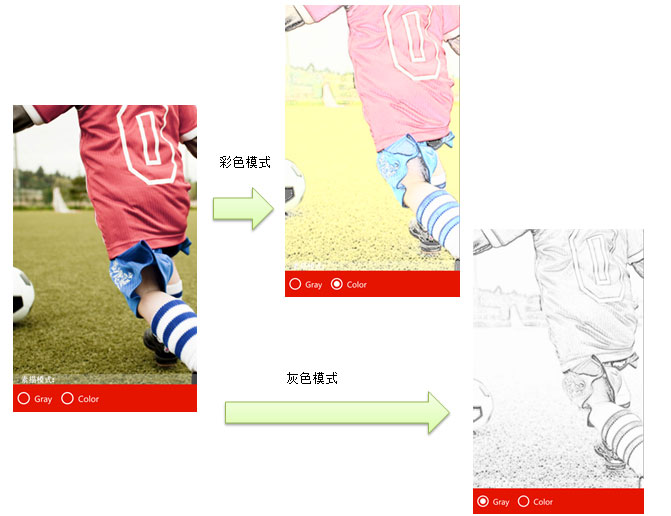
7�����ȴ� SketchFilterPage.xaml ҳ�棬�� XAML ҳ������һ�� Image �ؼ�������RadioButton �ؼ���
�ֱ�������ʾԤ��ͼ���л��˾�ģʽ��
<Grid x:Name="LayoutRoot" Background="Transparent" Tap="LayoutRoot_Tap"> <Image x:Name="PreviewImage"/> <Grid x:Name="gridControls" VerticalAlignment="Bottom" Background="#44ffffff" > <Grid.Resources> <Style TargetType="TextBlock"> <Setter Property="Margin" Value="20,0,0,0"/> <Setter Property="Foreground" Value="#ffffffff"/> <Setter Property="FontWeight" Value="ExtraBold"/> </Style> </Grid.Resources> <Grid.RowDefinitions> <RowDefinition Height="auto"/> <RowDefinition Height="auto"/> </Grid.RowDefinitions> <TextBlock Text="����ģʽ:"/> <StackPanel Orientation="Horizontal" Grid.Row="1" Background="{StaticResource PhoneAccentBrush}"> <RadioButton Content="Gray" GroupName="Mode" Checked="Gray_RadioButton_Checked"/> <RadioButton Content="Color" GroupName="Mode" Checked="Color_RadioButton_Checked"/> </StackPanel> </Grid> </Grid>
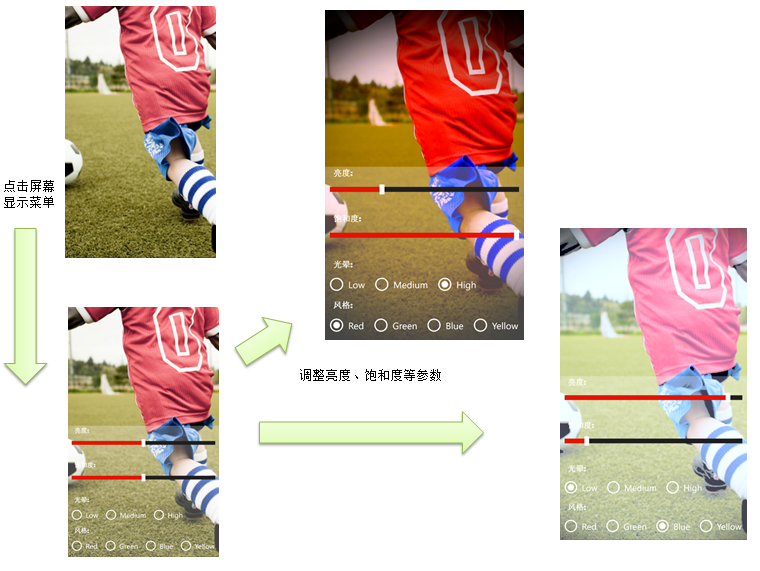
����� gridControls ������Ϊ“�������”�������� LayoutRoot �ؼ�ʱ���л��������غ���ʾ��
// �������� private void LayoutRoot_Tap(object sender, System.Windows.Input.GestureEventArgs e) { e.Handled = true; if (gridControls.Visibility == System.Windows.Visibility.Collapsed) { gridControls.Visibility = System.Windows.Visibility.Visible; } else { gridControls.Visibility = System.Windows.Visibility.Collapsed; } }
8�������� SketchFilterPage.xaml.cs ҳ���У���������������
// ʹ���˾� SketchMode _sketchMode = SketchMode.Gray; Stream _imageStreamOrigin;// ����ͼƬ��ԭʼ���� WriteableBitmap _writeBitmap; //������
9�������캯���У���ȡʾ��ͼƬ�����������Ժ������˾���
public SketchFilterPage() { InitializeComponent(); // ��ȡ xap ���е� ͼƬ StreamResourceInfo StreamInfo = App.GetResourceStream(new Uri("Sample.jpg", UriKind.Relative)); // �Ȱ�δ�����˾�������ʾ��ͼƬ��ʾ���� BitmapImage bitmapImage = new BitmapImage(); bitmapImage.SetSource(StreamInfo.Stream); _writeBitmap = new WriteableBitmap(bitmapImage); PreviewImage.Source = _writeBitmap; // ����ʾ��ͼƬ���������ڽ����������˾� _imageStreamOrigin = StreamInfo.Stream; }
10���������� RadioButton �� Checked �¼�������ΪͼƬ���ò�ͬ���˾�Ч����
// ��ɫ private void Gray_RadioButton_Checked(object sender, RoutedEventArgs e) { _sketchMode = SketchMode.Gray; CreatePreviewImage(); } // ��ɫ private void Color_RadioButton_Checked(object sender, RoutedEventArgs e) { _sketchMode = SketchMode.Color; CreatePreviewImage(); }
11��������� CreatePreviewImage() ��������ͼƬ�����˾�Ч����
public async void CreatePreviewImage() { if (_imageStreamOrigin == null || _writeBitmap == null) { return; } _imageStreamOrigin.Position = 0; // ��������˾�Ч�� var filters = new IFilter[] { new SketchFilter(_sketchMode) }; using (var source = new StreamImageSource(_imageStreamOrigin)) using (var filterEffect = new FilterEffect(source) { Filters = filters }) using (var renderer = new WriteableBitmapRenderer(filterEffect, _writeBitmap)) { await renderer.RenderAsync(); PreviewImage.Source = _writeBitmap; } }
12�����ֱ���“��ͼ�˾�”��SketchFilter�������� RadioButton ʱ������Ч����
13�� ��������LomoFilterPage.xaml ҳ���У���ʾ��ͼƬ���� LomoFilter��
������һ������������һ�� Image �ؼ���������ʾͼƬԤ����Ȼ���������� Silder�ؼ����ֱ�����˾������ȡ�
���Ͷȣ������������ RadioButton�ؼ����ֱ����������˾���“����”ģʽ��“��ɫ���”����Ӧ�� XAML���£�
<!--LayoutRoot �ǰ�������ҳ�����ݵĸ�����--> <Grid x:Name="LayoutRoot" Background="Transparent" Tap="LayoutRoot_Tap"> <Image x:Name="PreviewImage"/> <Grid x:Name="gridControls" Visibility="Collapsed" VerticalAlignment="Bottom" Background="#44ffffff" > <Grid.Resources> <Style TargetType="TextBlock"> <Setter Property="Margin" Value="20,0,0,0"/> <Setter Property="Foreground" Value="#ffffffff"/> <Setter Property="FontWeight" Value="ExtraBold"/> </Style> </Grid.Resources> <Grid.RowDefinitions> <RowDefinition Height="auto"/> <RowDefinition Height="auto"/> <RowDefinition Height="auto"/> <RowDefinition Height="auto"/> <RowDefinition Height="auto"/> <RowDefinition Height="auto"/> <RowDefinition Height="auto"/> <RowDefinition Height="auto"/> </Grid.RowDefinitions> <TextBlock Text="����:"/> <Slider Grid.Row="1" Value="0.5" Minimum="0" Maximum="1" ValueChanged="brightnessSlider_ValueChanged"/> <TextBlock Grid.Row="2" Text="���Ͷ�:"/> <Slider Grid.Row="3" Value="0.5" Minimum="0" Maximum="1" ValueChanged="saturationSlider_ValueChanged"/> <TextBlock Grid.Row="4" Text="����:"/> <StackPanel Orientation="Horizontal" Grid.Row="5"> <RadioButton Content="Low" GroupName="LomoVignetting" Checked="lowRadioButton_Checked"/> <RadioButton Content="Medium" GroupName="LomoVignetting" Checked="medRadioButton_Checked"/> <RadioButton Content="High" GroupName="LomoVignetting" Checked="highRadioButton_Checked"/> </StackPanel> <TextBlock Grid.Row="6" Text="���:"/> <StackPanel Orientation="Horizontal" Grid.Row="7"> <RadioButton Content="Red" GroupName="Style" Checked="Red_RadioButton_Checked"/> <RadioButton Content="Green" GroupName="Style" Checked="Green_RadioButton_Checked"/> <RadioButton Content="Blue" GroupName="Style" Checked="Blue_RadioButton_Checked"/> <RadioButton Content="Yellow" GroupName="Style" Checked="Yellow_RadioButton_Checked"/> </StackPanel> </Grid> </Grid>
14������Ӧ�� C# ҳ�棬�������� 6���������ֱ𱣴�ԭʼͼƬ�������˾������ò�����
// ʹ���˾� double _brightness = 0.5; double _saturation = 0.5; LomoVignetting _lomoVignetting = LomoVignetting.Medium; //���� LomoStyle _lomoStyle = LomoStyle.Neutral; Stream _imageStreamOrigin;// ����ͼƬ��ԭʼ���� WriteableBitmap _writeBitmap;// ������
15���ڹ��캯���У����ȶ�ȡʾ��ͼƬ��������ʾδ�����˾�������ͼƬ��
public LomoFilterPage() { InitializeComponent(); // ��ȡ xap ���е� ͼƬ StreamResourceInfo StreamInfo = App.GetResourceStream(new Uri("Sample.jpg", UriKind.Relative)); // �Ȱ�δ�����˾�������ʾ��ͼƬ��ʾ���� BitmapImage bitmapImage = new BitmapImage(); bitmapImage.SetSource(StreamInfo.Stream); _writeBitmap = new WriteableBitmap(bitmapImage); PreviewImage.Source = _writeBitmap; // ����ʾ��ͼƬ���������ڽ����������˾� _imageStreamOrigin = StreamInfo.Stream; }
16��Ȼ����һ�����˾��ķ�����ÿ�� Silder �ؼ����� RadioButton �ؼ����˾�������ʱ����һ�����������
public async void CreatePreviewImage() { if (_imageStreamOrigin == null || _writeBitmap == null) { return; } _imageStreamOrigin.Position = 0; // ��������˾�Ч�� var filters = new IFilter[] { new LomoFilter(_brightness, _saturation, _lomoVignetting, _lomoStyle) }; using (var source = new StreamImageSource(_imageStreamOrigin)) using (var filterEffect = new FilterEffect(source) { Filters = filters }) using (var renderer = new WriteableBitmapRenderer(filterEffect, _writeBitmap)) { await renderer.RenderAsync(); PreviewImage.Source = _writeBitmap; } }
17���������� SIider �� RadioButton �ؼ����¼������Ĵ��룬����Ĵ�����Ȼ�Ƚ϶࣬�����������⣺
#region �������� private void brightnessSlider_ValueChanged(object sender, RoutedPropertyChangedEventArgs<double> e) { _brightness = 1.0 - e.NewValue; CreatePreviewImage(); } private void saturationSlider_ValueChanged(object sender, RoutedPropertyChangedEventArgs<double> e) { _saturation = e.NewValue; CreatePreviewImage(); } protected void lowRadioButton_Checked(object sender, System.Windows.RoutedEventArgs e) { _lomoVignetting = LomoVignetting.Low; CreatePreviewImage(); } protected void medRadioButton_Checked(object sender, System.Windows.RoutedEventArgs e) { _lomoVignetting = LomoVignetting.Medium; CreatePreviewImage(); } protected void highRadioButton_Checked(object sender, System.Windows.RoutedEventArgs e) { _lomoVignetting = LomoVignetting.High; CreatePreviewImage(); } private void Red_RadioButton_Checked(object sender, RoutedEventArgs e) { _lomoStyle = LomoStyle.Red; CreatePreviewImage(); } private void Green_RadioButton_Checked(object sender, RoutedEventArgs e) { _lomoStyle = LomoStyle.Green; CreatePreviewImage(); } private void Blue_RadioButton_Checked(object sender, RoutedEventArgs e) { _lomoStyle = LomoStyle.Blue; CreatePreviewImage(); } private void Yellow_RadioButton_Checked(object sender, RoutedEventArgs e) { _lomoStyle = LomoStyle.Yellow; CreatePreviewImage(); } #endregionView Code
18�����й��̣�
19) �ܽ��ʵ��������Ƚ��٣�Ҳ���������⡣�й� Nokia Imaging SDK �˾�ʹ�����̣���ο�����ĵ���
�����������ӣ�http://pan.baidu.com/s/1c0Du3uS
������Դ����ʱ�������һ������������ Nokia Imaging SDK does not support the AnyCPU target platform.
��Ϊ Nokia Imaging SDK ֧���йܴ���ͱ��ش��룬�����ڱ���ǰ��Ҫ�������ã�
1����ģ����������ʱ���˵� -> ���� -> ���ù����� -> ��������ƽ̨ -> x86 2�������������ʱ�� �˵� -> ���� -> ���ù����� -> ��������ƽ̨ -> ARM
�����й�˵����ο��� http://developer.nokia.com/Resources/Library/Lumia/#!nokia-imaging-sdk/adding-libraries-to-the-project.html