���Ǽ���ѧϰTable View�����ݣ������Ҫ�����UITableViewCell����ǰһƪ�������������Ѿ�ʹ�ù�UITableViewCell��һ��Ĭ�ϵ�UITableViewCell����imageView��textLabel��detailTextLabel�����ԣ����Ǻܶ�ʱ����ЩĬ�ϵ����Բ�����������Ҫ����ʵ�����ʱ���������Լ��ƶ�UITableViewCell�����ݣ���ƪѧϰ�ľ����ƶ��Լ���UITableViewCell��
UITableViewCell�̳���UIView����������Լ��������subView�����棬������һ�㣬���ǾͿ��Զ����Լ���UITableViewCell�ˡ��ƶ�UITableViewCell��2�ַ�����һ����д��������UITableViewCell�ؼ��ϵ����ݣ���һ�����Ͽؼ���һ��UITableViewCell�ؼ��ϣ������ַ���������һ������������˵����
��������ʹ��code�ķ������������Լ���UITableViewCell
1������һ���µ���Ŀ��templateѡ��Single View Application������ΪCells 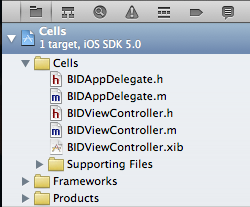
2������Table View������delegate��data source��File's Owner ѡ��BIDController.xib�ļ�����Object Library����һ��Table View��view�ϣ�Ȼ��ѡ��view�е�table view����Connections Inspector���϶�dataSource��delegate�ұߵ�СԲȦ��File's Owner�� 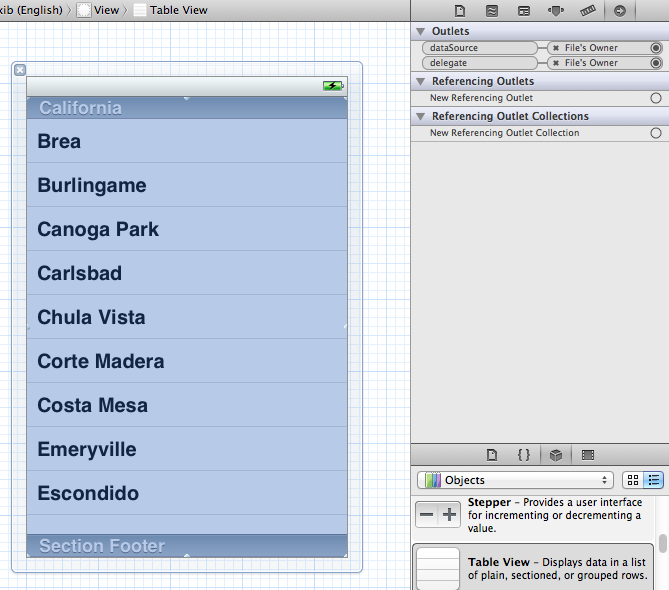
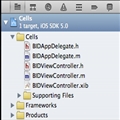
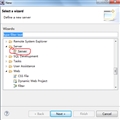
3������Cell ��Project navigator��ѡ��Cells�ļ��У�Ȼ��command+N������һ���µ��ļ����ڵ����ĶԻ����У����ѡ��Cocoa Touch���ұ�ѡ��Objective-C��Ȼ����Next 
����һ���Ի����а�Class����ΪBIDNameAndColorCell��Subclass ofѡ��UITableViewCell��Ȼ����Next 
����һ���Ի�����ѡ��Create����ɴ��� 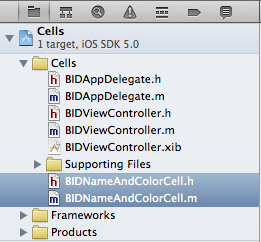
BIDNameAndColor�ļ��̳���UITableViewCell�����ǽ��ȶ�����ж��ƣ�����һЩ������Ҫ�Ŀؼ�����BIDViewController�е���table cell��ʱ��ֱ�ӵ�������ļ����ɡ�
4������BIDNameAndColorCell���� ��BIDNameAndColorCell.h�ļ����������´���
logs_code_copy">
#import <UIKit/UIKit.h>

@interface BIDNameAndColorCell : UITableViewCell

@property (copy, nonatomic) NSString *name;
@property (copy, nonatomic) NSString *color;

@end
���ǽ���table view cell����ʾ2���ַ�����һ����name����һ����color����ʾ�����ݻ��֮�����NSArray�ж�ȡ����ע�⣬��������ʹ�õ���copy��������ͨ��ʹ�õ�strong��ʹ��copy�ĺô��Dz���ı�ԭ�е��ַ����е����ݣ���Ȼ����������Ҳ����ı��ַ��������ݣ������ʹ����strongҲ���ⲻ�������ϵĽ��������һ��property��NSString�����ʹ��copy��
���ű༭BIDNameAndColorCell.m�ļ������������code
#import "BIDNameAndColorCell.h"

#define kNameValueTag 1
#define kColorValueTag 2

@implementation BIDNameAndColorCell
@synthesize name;
@synthesize color;
��������2������kNameValueTag��kColorValueTag����2������������ʶtable view cell�е�name��color�����ž���name��color��synthesize�ˣ���֮ǰ�����е�һ����
������BIDNameAndColorCell.m���Ѵ��ڵ�initWithStyle:reuseIdentifier:����
- (id)initWithStyle:(UITableViewCellStyle)style reuseIdentifier:(NSString *)reuseIdentifier
{
    self = [super initWithStyle:style reuseIdentifier:reuseIdentifier];
    if (self) {
        // Initialization code
        CGRect nameLabelRect = CGRectMake(0, 5, 70, 15);
        UILabel *nameLabel = [[UILabel alloc] initWithFrame:nameLabelRect];
        nameLabel.textAlignment = UITextAlignmentRight;
        nameLabel.text = @"Name:";
        nameLabel.font = [UIFont boldSystemFontOfSize:12];
        [self.contentView addSubview:nameLabel];

        CGRect colorLabelRect = CGRectMake(0, 26, 70, 15);
        UILabel *colorLabel = [[UILabel alloc] initWithFrame:colorLabelRect];
        colorLabel.textAlignment = UITextAlignmentRight;
        colorLabel.text = @"Color:";
        colorLabel.font = [UIFont boldSystemFontOfSize:12];
        [self.contentView addSubview:colorLabel];

        CGRect nameValueRect = CGRectMake(80, 5, 200, 15);
        UILabel *nameValue = [[UILabel alloc]initWithFrame:nameValueRect];

        nameValue.tag = kNameValueTag;
        [self.contentView addSubview:nameValue];

        CGRect colorValueRect = CGRectMake(80, 25, 200, 15);
        UILabel *colorValue = [[UILabel alloc]initWithFrame:colorValueRect];

        colorValue.tag = kColorValueTag;
        [self.contentView addSubview:colorValue];
    }
    return self;
}
����Ĵ���Ӧ�û��DZȽ����������İɣ�������4��UILabel��������UILabel�����Ժ��������뵽UITableViewCell�У�table view cell��һ��Ĭ�ϵ�view����contentView��contenView��������������subView���������code����������4��UILabel�������ӵ�contentView�У�ʹ�õ������[self.contentView addSubview:colorValue]
��˵һ�����洴����4��UILabel����������е����ã�nameLabel��colorLabel�������Ǵ����Label�����ǵ�ֵ�����ڸı䣬����ֻ�������Ե�ʹ���Ѿ��ֱ�Ϊ���Ǹ�ֵ�ˡ�nameValue��colorValue��2��label��������ʾNSArray�е�ֵ�ģ���Ҳ��Ϊʲôֻ����2��label����property����Ϊ������Ҫ�ı�ֵ��������code�л�δ��2��label�ƶ���tag�����tag�ľ���������ͨ��������ʶ�����label�����������code���ͻ������˽⡣
- (void)setName:(NSString *)n {
    if(![n isEqualToString:name]) {
        name = [n copy];
        UILabel *nameLabel = (UILabel *)[self.contentView viewWithTag:kNameValueTag];
        nameLabel.text = name;
    }
}

- (void)setColor:(NSString *)c {
    if(![c isEqualToString:color]) {
        color = [c copy];
        UILabel *colorLabel = (UILabel *)[self.contentView viewWithTag:kColorValueTag];
        colorLabel.text = color;
    }
}
@synthesize��������Զ�����get��set��������������������Ҫ�Լ�дset���������ͨ�������code������ϵͳ�Զ�Ϊ�������ɵ�set������2��set������ʵ����һ���ġ����ȱȽ��¸�ֵ���ַ����;ɵ��ַ����Ƿ�һ���������һ���ͽ��и�ֵ��Ȼ����Ҫ���͵ľ�����仰 UILabel *colorLabel = (UILabel *)[self.contentView viewWithTag:kColorValueTag]; ����ҵ�table view cell�еĿؼ�����ʹʹ�øղ����Ǵ�����2����������Ϊÿһ���ؼ���tagֵ���Dz�һ���ģ���˸���tagֵ�Ϳ��Ժܷ�����ҵ�������Ҫ�Ŀؼ���viewWithTag���ص�������(UIView *)���������ǽ�����ǿ��ת����(UILable *)���Ϳ��Եõ�������Ҫ��Label�ˣ�Ȼ���Label���и�ֵ��
5������BIDViewController���� ��BIDViewController.h���������´���
#import <UIKit/UIKit.h>

@interface BIDViewController : UIViewController <UITableViewDelegate, UITableViewDataSource>

@property (strong, nonatomic) NSArray *computers;

@end
�ܼ������͡�
��BIDViewController.m���������´���
#import "BIDViewController.h"
#import "BIDNameAndColorCell.h"

@implementation BIDViewController
@synthesize computers;

......

- (void)viewDidLoad
{
    [super viewDidLoad];
    // Do any additional setup after loading the view, typically from a nib.
    NSDictionary *row1 = [[NSDictionary alloc] initWithObjectsAndKeys:
                          @"MacBook", @"Name", @"White", @"Color", nil];
    NSDictionary *row2 = [[NSDictionary alloc] initWithObjectsAndKeys:
                          @"MacBook Pro", @"Name", @"Silver", @"Color", nil];
    NSDictionary *row3 = [[NSDictionary alloc] initWithObjectsAndKeys:
                          @"iMac", @"Name", @"Silver", @"Color", nil];
    NSDictionary *row4 = [[NSDictionary alloc] initWithObjectsAndKeys:
                          @"Mac Mini", @"Name", @"Silver", @"Color", nil];
    NSDictionary *row5 = [[NSDictionary alloc] initWithObjectsAndKeys:
                          @"Mac Pro", @"Name", @"Silver", @"Color", nil];

    self.computers = [[NSArray alloc] initWithObjects:row1, row2, row3, row4, row5, nil];
}

- (void)viewDidUnload
{
    [super viewDidUnload];
    // Release any retained subviews of the main view.
    // e.g. self.myOutlet = nil;
    self.computers = nil;
}
������������BIDNameAndColor��ͷ�ļ���֮�����ǽ��ᴴ������ʵ������viewDidLoad�У�������5��NSDictionary�����ڱ���name��color��ֵ�ԣ�ʹ�õķ�����initWithObjectsAndKeys������˵���������ǰһ����Ϊobject����һ����Ϊkey���ٸ����ӣ����һ��NSDictionary�У�@"Mac Pro"����object��@"Name"����key�����5��NSDictionary���浽NSArray�У�computers�У�
�����������code
#pragma mark -
#pragma mark Table Data Source Methods
- (NSInteger)tableView:(UITableView *)tableView numberOfRowsInSection:(NSInteger)section {
    return [self.computers count];
}

- (UITableViewCell *)tableView:(UITableView *)tableView cellForRowAtIndexPath:(NSIndexPath *)indexPath {
    static NSString *CellTableIdentifier = @"CellTableIdentifier";

    BIDNameAndColorCell *cell = [tableView dequeueReusableCellWithIdentifier:CellTableIdentifier];
    if(cell == nil) {
        cell = [[BIDNameAndColorCell alloc]
                initWithStyle:UITableViewCellStyleDefault
                reuseIdentifier:CellTableIdentifier];
    }

    NSUInteger row = [indexPath row];
    NSDictionary *rowData = [self.computers objectAtIndex:row];

    cell.name = [rowData objectForKey:@"Name"];
    cell.color = [rowData objectForKey:@"Color"];

    return cell;
}
tableView:numberOfRowsInSection: ����section�е����� tableView:cellForRowAtIndexPath: �����������Щ��ͬ�����Դ�����һ��BIDNameAndColorCell�Ķ������Ǵ���Ĭ�ϵ�UITableViewCell�������Ϳ���ֱ��ʹ�������Լ������cell�ˣ�������ȻҲָ����UITableViewCellStyleDefault�����Dz��������ã���Ϊ�����Լ�������cell
֮��Ĵ���Ӧ�úܺ����⣬��ֱ�ۡ�
6���������� 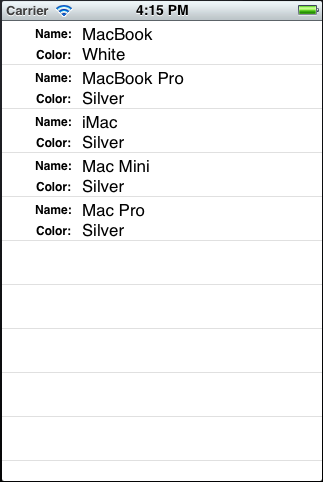
Cells
7��ʹ��UITableViewCell�ؼ���������Ŀ������table view������File's Owner ��������ʹ�õڶ��ַ���������UITableViewCell�����յ�Ч�������������һ��������һ���µ���Ŀ��ͬ��ѡ��Single View Application������ΪCells2 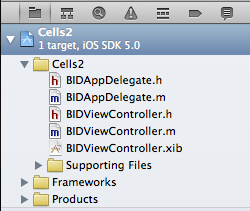
����Table View������delegate��data source��File's Owner
8������BIDNameAndColorCell�ļ����༭ �����������һ��������BIDNameAndColorCell�ļ� 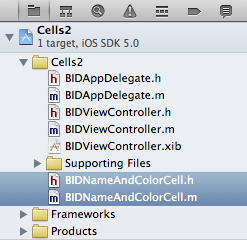
��BIDNameAndColorCell.h�ļ����������´���
#import <UIKit/UIKit.h>

@interface BIDNameAndColorCell : UITableViewCell <UITableViewDelegate, UITableViewDataSource>
@property (copy, nonatomic) NSString *name;
@property (copy, nonatomic) NSString *color;

@property (strong, nonatomic) IBOutlet UILabel *nameLabel;
@property (strong, nonatomic) IBOutlet UILabel *colorLabel;

@end
��֮ǰ������ͬ���ǣ����Ƕ�������2��Outlet����Ϊ֮��Ҫ����xib�������2��outlet��ָ��xib����2��UILabel
��BIDNameAndColorCell.m�ļ����������´���
#import "BIDNameAndColorCell.h"

@implementation BIDNameAndColorCell

@synthesize name;
@synthesize color;
@synthesize nameLabel;
@synthesize colorLabel;

- (void)setName:(NSString *)n {
    if(![n isEqualToString:name]) {
        name = [n copy];
        nameLabel.text = name;
    }
}

- (void)setColor:(NSString *)c {
    if(![c isEqualToString:color]) {
        color = [c copy];
        colorLabel.text = color;
    }
}
�������¶�����setName��setColor�����ﲻ��Ҫʹ��tag����Ϊ����ֱ��ʹ��outlet�Ϳ����ҵ�������Ҫ��UILabel����������Ҳû��initWithStyle:reuseIdentifier�д���4��Label����Ϊ���ǻ���֮��UITableViewCell�ؼ������ӡ�
9������xib ��Project navigator������Ҽ�����Cells2�ļ��У�Ȼ��ѡ��New File...��������ĶԻ��������ѡ��User Interface���ұ�ѡ��Empty�����Next 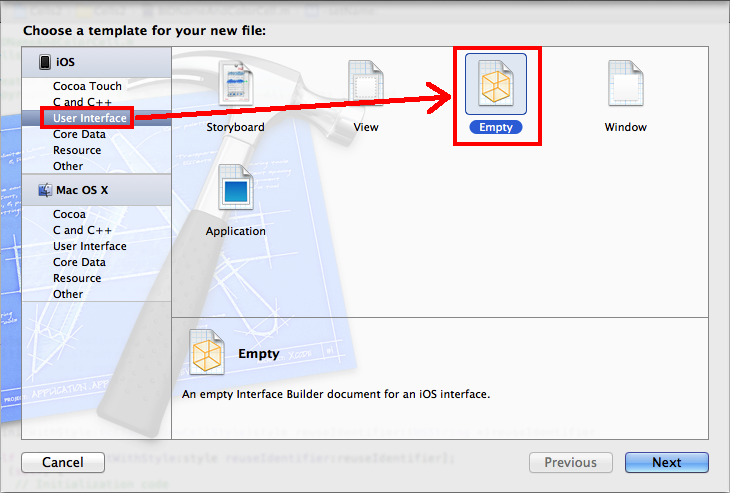
֮���Device Family��ѡ��iphone�����Next 
����ΪBIDNameAndColorCell.xib�����Create 
��Project navigator��ѡ��BIDNameAndColorCell.xib�ļ�����Ϊ���Ǵ�������Empy�����GUI��ʲô��û�У���Object library���ҵ�Table View Cell 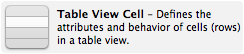 �ϵ�GUI��
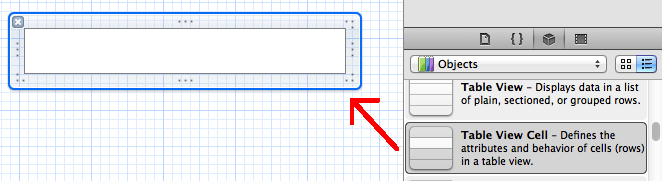
ѡ��view�е�table view cell����Attributes inspector���ҵ�Identifier��������ΪCellTableIdentifier 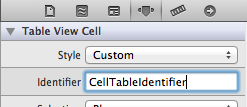 ���Identifier����֮ǰ����code���õ�����Identifier
10����table view cell�����ӿؼ� ��table view cell����4��UILable 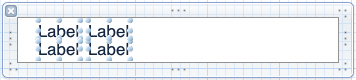
�����Ϸ���UILabel����Ϊ"Name:"��Ȼ������Ϊ���壨��attribute inspector�����ã� 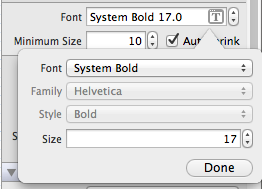 �����·���UILabel����Ϊ"Color:"��Ȼ������Ϊ���壨��attribute inspector�����ã� �����Ϸ���UILabel�����ұ߳��ָ����ߵ�λ�� �����·���UILabel�����ұ߳��ָ����ߵ�λ�� ������ɺ����������
 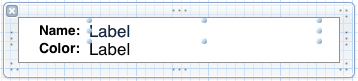 �����ؽ��ұ�2��Label������ȥ�������������ǻ�Ϊ�������¸�ֵ��
11������ �������ǽ�BIDNameAndColorCell.xib��BIDNameAndColorCell�ļ�����������ѡ��GUI�е�view����Identify inspector����Classָ��ΪBIDNameAndColorCell 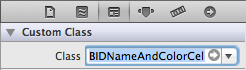
����ѡ��view���л���connections inspector��������colorLabel��nameLabel  ��colorLabel��nameLabel�ϵ�view�ж�Ӧ��UILabel�ϣ��������������ұߵ�2��label��
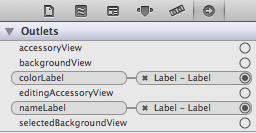
12��д���� ��BIDViewController.h�ļ����������´���
#import <UIKit/UIKit.h>

@interface BIDViewController : UIViewController <UITableViewDelegate, UITableViewDataSource>

@property (strong, nonatomic) NSArray *computers;

@end
�������һ������һ�����������ˣ���BIDViewController.m�ļ����������´���
#import "BIDViewController.h"
#import "BIDNameAndColorCell.h"

@implementation BIDViewController
@synthesize computers;
......
- (void)viewDidLoad
{
    [super viewDidLoad];
    // Do any additional setup after loading the view, typically from a nib.
    NSDictionary *row1 = [[NSDictionary alloc] initWithObjectsAndKeys:
                          @"MacBook Air", @"Name", @"Silver", @"Color", nil];
    NSDictionary *row2 = [[NSDictionary alloc] initWithObjectsAndKeys:
                          @"MacBook Pro", @"Name", @"Silver", @"Color", nil];
    NSDictionary *row3 = [[NSDictionary alloc] initWithObjectsAndKeys:
                          @"iMac", @"Name", @"Silver", @"Color", nil];
    NSDictionary *row4 = [[NSDictionary alloc] initWithObjectsAndKeys:
                          @"Mac Mini", @"Name", @"Silver", @"Color", nil];
    NSDictionary *row5 = [[NSDictionary alloc] initWithObjectsAndKeys:
                          @"Mac Pro", @"Name", @"Silver", @"Color", nil];

    self.computers = [[NSArray alloc] initWithObjects:row1, row2,
                      row3, row4, row5, nil];
}

- (void)viewDidUnload
{
    [super viewDidUnload];
    // Release any retained subviews of the main view.
    // e.g. self.myOutlet = nil;
    self.computers = nil;
}

#pragma mark -
#pragma mark Table View Data Source Methods
- (NSInteger)tableView:(UITableView *)tableView
 numberOfRowsInSection:(NSInteger)section {
    return [self.computers count];
}

- (UITableViewCell *)tableView:(UITableView *)tableView cellForRowAtIndexPath:(NSIndexPath *)indexPath {
    static NSString *CellTableIdentifier = @"CellTableIdentifier";
    static BOOL nibsRegistered = NO;
    if(!nibsRegistered) {
        UINib *nib = [UINib nibWithNibName:@"BIDNameAndColorCell" bundle:nil];
        [tableView registerNib:nib forCellReuseIdentifier:CellTableIdentifier];
        nibsRegistered = YES;
    }

    BIDNameAndColorCell *cell = [tableView dequeueReusableCellWithIdentifier:CellTableIdentifier];

    NSUInteger row = [indexPath row];
    NSDictionary *rowData = [self.computers objectAtIndex:row];

    cell.name = [rowData objectForKey:@"Name"];
    cell.color = [rowData objectForKey:@"Color"];

    return cell;
}
������Ҫ���ĵľ���tableView:cellForRowAtIndexPath��������е�if�����δ��룺
if(!nibsRegistered) { UINib *nib = [UINib nibWithNibName:@"BIDNameAndColorCell" bundle:nil]; [tableView registerNib:nib forCellReuseIdentifier:CellTableIdentifier]; nibsRegistered = YES; }
UINibͨ��xib�ļ��������ҵ�xib�ļ���Ȼ��tableView��������xib�ļ���nibsRegistered��ֻ֤�е�һ�ε������������ʱ���ȥѰ�Ҳ�����xib��֮���ᡣ
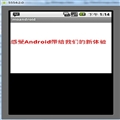
13���������� �������г��õ��Ľ����֮ǰ��һ������Ӧ����һ���� 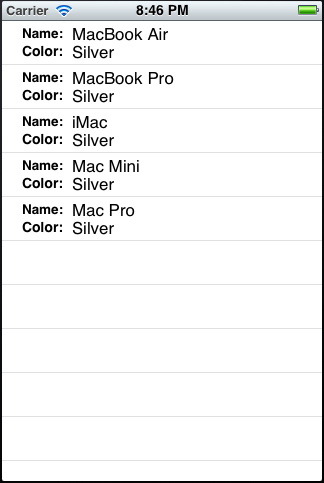
14���ܽ� ��ƪ����ʹ��2�ַ�ʽ������UITableViewCell��һ���Ǵ���ʵ�֣���һ���Ǵ�ͳ���Ͽؼ�ʵ�֣�2�ַ���Ӧ��˵�������ף���һ���Ͽؼ����Ǻõģ���Ӧ���Ѿ�Ԥ�е��Ժ�Ľ��沼��Ӧ�ö�ʹ��д������ʵ�֣��Ѿ��кü�������ͨ���ҵ�����ѧϰ���ǵõ��Ľ�������ؼ��IJ��ֳ����˲����Ŀǰ��ԭ��������ʹ�õ�ģ�������ҵIJ�һ������ʹ�õ���iPhone 5.0 Simulator�����ǿ�������������ģ�����������Ҿ����ճɲ����ԭ������Ϊѧϰ���������Ƕ���ʹ���Ͽؼ��ķ��������ֵģ��������ɲ�������������code��ʵ�ֲ��֣���ô���Ӧ�û���һ�¡�
��һƪ�����ݻὲ��Table View��Section��index���������ȵȣ����ݱȽ϶�Ҳ�Ƚ�ʵ�ã�ʵ�ֵ�Ч������ 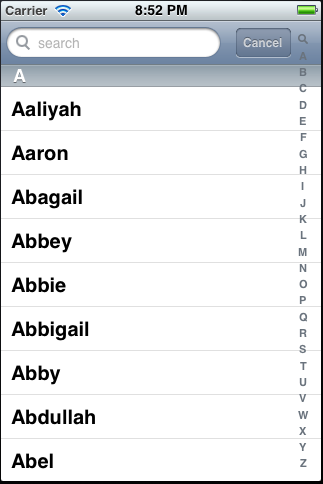 �һᾡ��д��������ģ�лл��ҵĹ�ע�����κ����������ɣ������֪���Ļ����һᾡ���ش�лл��
Cells2