Android在3.0中引入了fragments的概念,主要目的是用在大屏幕设备上--例如平板电脑上,支持更加动态和灵活的UI设计。平板电脑的屏幕要比手机的大得多,有更多的空间来放更多的UI组件,并且这些组件之间会产生更多的交互。Fragment允许这样的一种设计,而不需要你亲自来管理 viewhierarchy的复杂变化。 通过将activity的布局分散到fragment中, 你可以在运行时修改activity的外观,并在由activity管理的back stack中保存那些变化.(http://developer.android.com/guide/topics/fundamentals/fragments.html)
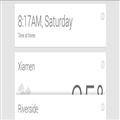
例如, 一个新闻应用可以在屏幕左侧使用一个fragment来展示一个文章的列表,然后在屏幕右侧使用另一个fragment来展示一篇文章--2个fragment并排显示在相同的一个activity中,并且每一个fragment拥有它自己的一套生命周期回调方法,并且处理它们自己的用户输入事件。 因此, 取代使用一个activity来选择一篇文章而另一个activity来阅读文章的方式,用户可以在同一个activity中选择一篇文章并且阅读, 如图所示:

fragment在你的应用中应当是一个模块化和可重用的组件.即,因为fragment定义了它自己的布局, 以及通过使用它自己的生命周期回调方法定义了它自己的行为,你可以将fragment包含到多个activity中. 这点特别重要, 因为这允许你将你的用户体验适配到不同的屏幕尺寸.举个例子,你可能会仅当在屏幕尺寸足够大时,在一个activity中包含多个fragment,并且,当不属于这种情况时,会启动另一个单独的,使用不同fragment的activity.
继续之前那个新闻的例子 -- 当运行在一个特别大的屏幕时(例如平板电脑),应用可以在Activity A中嵌入2个fragment。然而,在一个正常尺寸的屏幕(例如手机)上,没有足够的空间同时供2个fragment用, 因此, Activity A会仅包含文章列表的fragment, 而当用户选择一篇文章时, 它会启动ActivityB,它包含阅读文章的fragment.因此, 应用可以同时支持上图中的2种设计模式。
通常, 应当至少实现如下的生命周期方法:
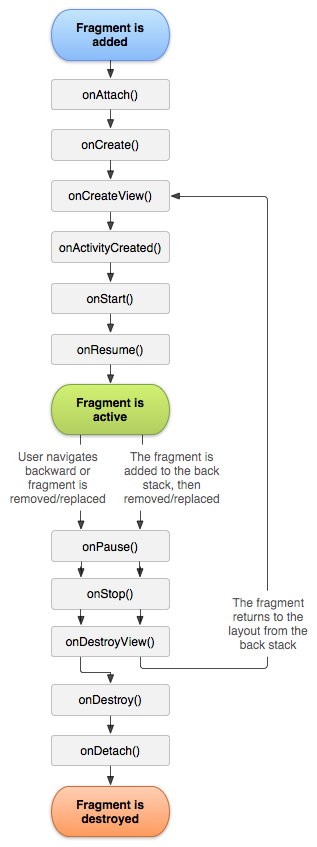
大多数应用应当为每一个fragment实现至少这3个方法,但是还有一些其他回调方法你也应当用来去处理fragment生命周期的各种阶段.全部的生命周期回调方法将会在后面章节 Handlingthe Fragment Lifecycle 中讨论.
除了继承基类 Fragment , 还有一些子类你可能会继承:
import com.menglifang.frag.FragmentOne;
import com.menglifang.frag.FragmentTwo;
import com.menglifang.frag.Fragmentfour;
import com.menglifang.frag.Fragmentfree;
import android.os.Bundle;
import android.support.v4.app.FragmentActivity;
import android.support.v4.app.FragmentManager;
import android.support.v4.app.FragmentTransaction;
import android.view.View;
import android.view.View.OnClickListener;
import android.widget.FrameLayout;
import android.widget.LinearLayout;
import android.widget.TextView;

public class MainActivity extends FragmentActivity implements OnClickListener{
    FrameLayout frameLayout;
     TextView text1,text2,text3,text4;
    FragmentManager fm;
     private FragmentTransaction ft;
    @Override
    protected void onCreate(Bundle savedInstanceState) {
        super.onCreate(savedInstanceState);
        setContentView(R.layout.activity_main);
        frameLayout=(FrameLayout ) findViewById(R.id.frag_view);
        text1=(TextView) findViewById(R.id.tab_one);
        text2=(TextView) findViewById(R.id.tab_two);
        text3=(TextView) findViewById(R.id.tab_free);
        text4=(TextView) findViewById(R.id.tab_four);

        text1.setOnClickListener(this);
        text2.setOnClickListener(this);
        text3.setOnClickListener(this);
        text4.setOnClickListener(this);
        fm=this.getSupportFragmentManager();
        ft=fm.beginTransaction();
        ft.replace(R.id.frag_view, new FragmentOne());
        ft.commit();

    }

    @Override
    public void onClick(View arg0) {
        ft=fm.beginTransaction();
        switch(arg0.getId()){
        case R.id.tab_one:
            ft.replace(R.id.frag_view, new FragmentOne());
            break;
        case R.id.tab_two:
            ft.replace(R.id.frag_view, new FragmentTwo());
            break;
        case R.id.tab_free:
            ft.replace(R.id.frag_view, new Fragmentfree());
            break;
        case R.id.tab_four:
            ft.replace(R.id.frag_view, new Fragmentfour());
            break;

        }
        ft.commit();
    }


}
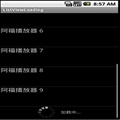
创建了四个Fragement:为了简单我的四个fragment中每个Fragement否是一样的就是各自的布局文件不同
import com.menglifang.fragment.R;
import android.os.Bundle;
import android.support.v4.app.Fragment;
import android.view.LayoutInflater;
import android.view.View;
import android.view.ViewGroup;

public class FragmentOne extends Fragment{
    @Override
    public View onCreateView(LayoutInflater inflater, ViewGroup container,
            Bundle savedInstanceState) {
        // TODO Auto-generated method stub
        View view=inflater.inflate(R.layout.fragone, null);
        return view;//super.onCreateView(inflater, container, savedInstanceState);
    }

}
布局文件:在此只给出MainActivity中的布局和一个fragment中的布局
MainActivity中的布局:activity_main.xml
<RelativeLayout xmlns:android="http://schemas.android.com/apk/res/android"
    xmlns:tools="http://schemas.android.com/tools"
    android:layout_width="match_parent"
    android:layout_height="match_parent"
    tools:context=".MainActivity" >
<LinearLayout
    android:id="@+id/tab"
    android:layout_width="match_parent"
    android:layout_height="wrap_content"
    android:orientation="horizontal">
    <TextView
        android:id="@+id/tab_one"
        android:layout_width="wrap_content"
        android:layout_height="wrap_content"
        android:layout_weight="1"
        android:text="最新新闻"/>
    <TextView android:id="@+id/tab_two"
        android:layout_width="wrap_content"
        android:layout_height="wrap_content"
        android:layout_weight="1"
        android:text="热点新闻"/>
    <TextView
        android:id="@+id/tab_free"
        android:layout_width="wrap_content"
        android:layout_height="wrap_content"
        android:layout_weight="1"
        android:text="社会新闻"/>
    <TextView
        android:id="@+id/tab_four"
        android:layout_width="wrap_content"
        android:layout_height="wrap_content"
        android:layout_weight="1"
        android:text="利物浦新闻"/>
</LinearLayout>
   <FrameLayout
       android:orientation="vertical"
       android:id="@+id/frag_view"
       android:layout_below="@+id/tab"
       android:layout_width="fill_parent"
       android:layout_height="fill_parent"
       android:background="#ffff00"></FrameLayout>
</RelativeLayout>
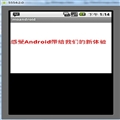
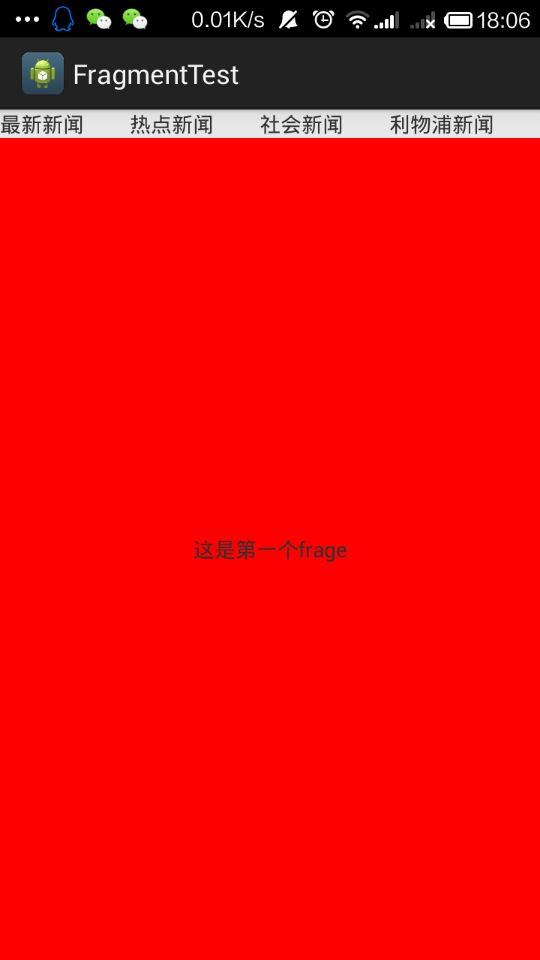
一个fragment的布局:fragone.xml
<?xml version="1.0" encoding="utf-8"?>
<LinearLayout xmlns:android="http://schemas.android.com/apk/res/android"
    android:layout_width="match_parent"
    android:layout_height="200dp"
    android:orientation="vertical" >
    <TextView
        android:background="#ff0000"
        android:gravity="center"
        android:layout_width="match_parent"
        android:layout_height="match_parent"
        android:text="这是第一个frage"/>
</LinearLayout>

其实这个列子好简单,一看基本就明白了,我在网上查了,好多人都是拿官网的列子复制下来,我觉得实实在在的列子比较容易让人理解
多有不足欢迎大家学习交流